

Table of Contents
ToggleThe blue screen of death on your Nintendo Switch is one of those heart-stopping moments every gamer dreads. You’re in the middle of a heated match or deep into your favorite story-driven game, and suddenly everything crashes with nothing but that ominous blue screen staring back at you. The frustration is real, but here’s the good news: most blue screen issues are fixable without sending your console in for repair.
Whether you’re dealing with a one-off crash or a recurring nightmare that keeps killing your gaming sessions, understanding what’s happening under the hood makes all the difference. This guide walks you through the most common causes, quick fixes that work in minutes, and advanced troubleshooting steps that’ll get your Switch back in action. We’ll also cover when it’s time to consider a factory reset or hardware repair, so you know exactly what you’re dealing with.
Key Takeaways
- The Nintendo Switch blue screen of death is usually caused by software glitches, corrupted game data, or hardware issues—most are fixable with simple troubleshooting steps in under ten minutes.
- A force restart, hard reset, or system software update resolves the majority of blue screen crashes without requiring a factory reset or professional repair.
- If crashes persist after advanced troubleshooting, check your microSD card for corruption, reinstall problem games, or use Recovery Mode to repair system files before considering a full factory reset.
- Maintain your Switch regularly by updating software monthly, clearing cache, keeping 2-3 GB of storage free, and avoiding physical damage to prevent future blue screen incidents.
- Hardware failures requiring official Nintendo repair typically cost $95–$150 out of warranty, so always back up save data to Nintendo Switch Online before attempting a factory reset.
What Causes The Nintendo Switch Blue Screen Of Death?
The blue screen on your Switch isn’t random, it’s the console’s way of crashing when something goes wrong. Understanding the root cause is half the battle. The issue could be software-related, hardware-related, or even a combination of both. Let’s break down the main culprits.
Software Glitches And Game Crashes
Software glitches are the most common reason you’ll see a blue screen. These happen when a game or application hits an unexpected error and the system can’t recover gracefully. A buggy game update, conflicting software, or simply a game pushing the hardware too hard can trigger this crash.
Specific games are more prone to crashes than others. Newer, more graphically demanding titles sometimes struggle on the Switch’s hardware, especially if they’re poorly optimized. Third-party developers occasionally release updates that introduce new bugs, it happens even with well-tested software. If the blue screen only happens when running one particular game, that’s a red flag pointing directly at a software issue rather than a hardware problem.
Corrupted game data is another software culprit. When a game’s files get damaged, whether from a forced shutdown, interrupted download, or storage corruption, the console can’t load the game properly and crashes.
Hardware Failures And System Issues
Hardware problems are less common but definitely more serious. The Switch’s internal components can degrade over time, especially the CPU, GPU, or RAM. Overheating is a major hardware killer. If your console runs hot for extended periods, the thermal stress can cause the system to crash as a fail-safe to prevent permanent damage.
Connection issues inside the console matter too. The Switch has ribbon cables and connectors that can loosen if the system takes physical damage or gets heavily used. A loose connection between the motherboard and the screen, or between internal components, can cause crashes.
Power delivery problems also fall into this category. If the charging circuits are failing or the power management system is degraded, the system might crash under load. Docking issues, broken charging ports, or faulty power supplies can all contribute.
Corrupted Data And File Errors
Your system’s internal storage can develop errors over time, especially with constant reading and writing. This isn’t the same as a corrupted game, it’s corruption in the Switch’s system files themselves. A sudden power loss during a system update, a broken microSD card, or storage going bad can cause file system errors.
When the system tries to access corrupted files during startup or while running, it crashes with a blue screen. This is particularly problematic because it can affect multiple games or even prevent the system from booting properly. The microSD card is a common weak point here. Even though it’s removable and replaceable, a corrupted microSD can cause widespread issues across multiple games and applications.
Quick Fixes You Should Try First
Before diving into complex troubleshooting, try these simple fixes. Most blue screen issues resolve with one of these three steps. They take less than five minutes, and you’re not risking anything by attempting them.
Force Restart Your Console
A force restart clears temporary memory and processes that might be causing issues. This is different from a normal shutdown, it cuts power immediately rather than gracefully shutting down the system.
Here’s how to force restart your Switch:
- Press and hold the power button on the top of the console for at least 12 seconds. Don’t release it, keep holding.
- The screen will flash and the console will turn off completely.
- Wait 10 seconds, then press the power button normally to turn it back on.
- Try launching your game again.
This clears cached data that might be causing crashes. If your Switch was stuck in a crash loop, this usually breaks the cycle. The console will boot fresh, and most temporary glitches disappear. If the blue screen was a one-time occurrence, you’re probably done.
Check For Loose Connections
Physical connections inside and outside your Switch can work loose, especially if you transport the console frequently or use it in handheld mode constantly.
Start with the obvious externals:
- Make sure the dock is properly seated if you’re using docked mode. The USB-C connection must be fully inserted.
- Check that your Joy-Cons are firmly attached to the console. Slide them in until you hear a click.
- Verify your microSD card is fully inserted into the slot. It should click into place.
If those look good, the issue might be inside. You can’t easily access internal components without opening the console (which voids your warranty), but you can test whether a connection issue is the problem. Try playing in handheld mode if you normally use a dock, or vice versa. If the crashes only happen in one mode, it points to a docking or connection issue.
Perform A Hard Reset
A hard reset is more aggressive than a force restart, it clears all RAM and cached data while keeping your installed games and save files intact.
Perform a hard reset with these steps:
- Turn off your Switch completely.
- Press and hold the power button for 12 seconds, just like a force restart.
- Once it powers on, immediately go to System Settings > System > Reset > Reset All Settings.
- Confirm the reset when prompted.
- Wait for the process to complete, this takes a minute or two.
This clears problematic cached data and system settings that might be causing crashes. It’s safe: your games, saves, and account information stay intact. If the blue screen was caused by corrupted temporary files, this usually fixes it.
Advanced Troubleshooting Steps
If the quick fixes didn’t work, it’s time to dig deeper. These steps require a bit more patience, but they resolve the majority of persistent blue screen issues without needing a factory reset.
Clear Cache And Temporary Files
Your Switch stores temporary cache files for games and applications. When these files accumulate or become corrupted, they can trigger crashes. Clearing them is safe and won’t delete your saved games.
Clear cache for individual games:
- Go to System Settings > Data Management > Manage Software.
- Select the game that’s crashing.
- Choose Clear Cache if the option appears.
- Confirm and wait for the process to complete.
For a system-wide cache clear, you’ll need to archive and reinstall games (covered in the next section). This is more thorough but also more time-consuming.
Update Your System Software
Outdated system software sometimes has bugs that cause crashes. Nintendo regularly releases patches that fix stability issues and compatibility problems.
Check for and install updates:
- Go to System Settings > System > System Update.
- Select Update to check for the latest version.
- If an update is available, select Update again to download and install it.
- Your console will restart during installation, don’t turn it off.
This process usually takes 5-10 minutes. Make sure your console is plugged in during the update to prevent power loss. After updating, try the game that was crashing. Many users find that a pending system update was the culprit all along.
Reinstall Problem Games Or Applications
If one specific game keeps crashing with a blue screen, the game’s files might be corrupted. Reinstalling clears out the bad data and downloads fresh files.
How to reinstall a game:
- Go to System Settings > Data Management > Manage Software.
- Select the problematic game.
- Choose Delete to remove it from your console (save data stays intact if saved to the cloud or internal storage).
- Go to your Home Screen, find the game in your purchased list, and select Download.
- Wait for the installation to complete, time varies by file size and internet speed.
Once reinstalled, launch the game and see if the crashes stop. This fixes corrupted download data or installation errors that were causing crashes. Note: If the game requires an additional data pack or update, download those too before testing.
Check Your MicroSD Card For Errors
Your microSD card stores a ton of game files. If the card is failing or corrupted, it can cause widespread crashes across multiple games. Testing the card helps identify if it’s the problem.
First, try games stored on internal storage only:
- Remove the microSD card from your Switch.
- Try launching a game that’s stored on the console’s internal storage.
- If internal games run fine but games on the microSD card crash, your card is likely failing.
If you suspect card failure, back up your data (if possible) and try a different microSD card if you have one. Cheap or counterfeit microSD cards are common culprits. A genuine, high-quality card from brands like SanDisk or Samsung is worth the investment. If replacing the card fixes your crashes, you’ve found your answer. You can also perform an error check on the card using a computer and card reader, run a CHKDSK utility on Windows or Disk Utility on Mac if you want to try repairing it first.
How To Fix Corrupted Game Data
Corrupted game data is insidious because it might affect only one game or multiple games depending on where the corruption occurred. Let’s walk through identifying and fixing it.
Identifying Corrupted Files
Corrupted data usually shows specific patterns. If a game crashes at the exact same point every time you play (always at the same level, always after a certain action), corruption is a strong suspect. Consistent crashes in one game while others run fine also point to corruption.
You might also see error messages when launching a game, like “Unable to start software” or “An error occurred” without crashing to the blue screen. These are signs of file system issues.
To diagnose whether it’s really corruption:
- Try another game that uses similar file sizes or genres. If other games run fine, it’s likely game-specific corruption.
- Check your free storage space. Go to System Settings > System > Storage. If you’re below 1-2 GB free, storage constraints might be causing crashes.
- Note exactly when and how the game crashes. Provide this info if you contact Nintendo support.
Archiving And Reinstalling Games
Archiving is different from deleting, it removes the game’s data but keeps your save files and profile information intact. You can re-download the game fresh afterward.
Here’s how to archive a game:
- Go to System Settings > Data Management > Manage Software.
- Select the problematic game.
- Choose Archive instead of Delete.
- Confirm the action.
After archiving:
- Go to your Home Screen.
- Select the game’s icon (it will show as “not installed”).
- Select Install or Download to re-download it fresh.
- Wait for the installation to complete fully.
This approach gives you a clean installation without losing your save data. If the game runs smoothly after this, the original installation was corrupted. The archive function is particularly useful for games with large file sizes (20+ GB): it saves you storage space while troubleshooting.
Using System Recovery Options
If corrupted data is affecting multiple games or your entire system, the Nintendo Switch has built-in recovery tools you can access.
Access Recovery Mode:
- Power off your Switch completely.
- Press and hold Volume Down and Power buttons simultaneously for about 10 seconds.
- Your Switch will boot into Recovery Mode (you’ll see a recovery menu on the screen).
- Select Repair Installation to let the system check and repair corrupted files.
- Follow the on-screen instructions. This process takes 10-20 minutes depending on your storage.
Repair Installation is safe, it won’t delete your games, saves, or personal data. It’s designed specifically to fix corrupted system files. If system-level corruption was causing your blue screens, this step should resolve it. After completing recovery, restart normally and test your games.
When To Factory Reset Your Switch
A factory reset is your nuclear option, it wipes everything and returns your Switch to like-new condition. Only do this when other troubleshooting steps have failed, because you’ll lose all locally saved data and need to re-download your games.
Backing Up Your Save Data
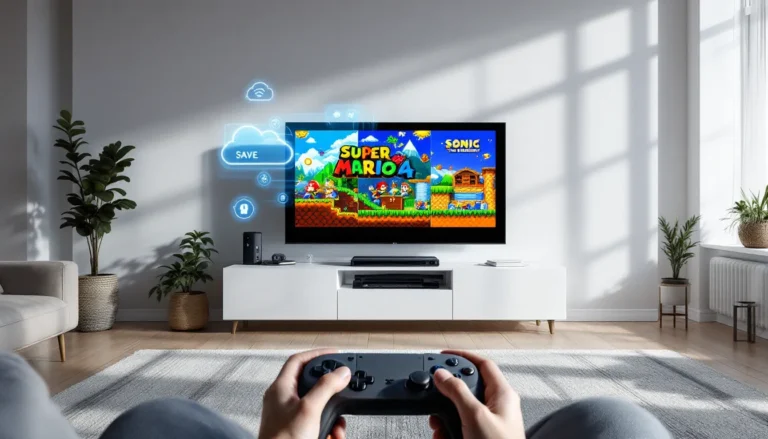
Before you factory reset, save your save data if possible. The good news is Nintendo Switch Online subscribers can back up saves to the cloud automatically for most games.
Check if your saves are backed up:
- Make sure you’re connected to the internet.
- Go to System Settings > Data Management > Save Data Cloud Backup.
- Your subscribed games should show “Backed Up” status.
- If any important games aren’t backed up, consider subscribing to Nintendo Switch Online if you haven’t already.
For games that don’t support cloud backup (certain third-party titles), you’ll lose those saves. Make a note of which games those are before proceeding.
If you’re not a Switch Online subscriber, your local saves can’t be backed up without the subscription. You’ll lose them during a factory reset. This is worth considering before resetting, sometimes it’s better to wait for a targeted fix rather than lose weeks of progress.
Step-By-Step Factory Reset Process
Once you’ve backed up what you can, follow this process carefully:
- Go to System Settings > System > Formatting Options > Reset Console.
- Read the warning carefully. You’re about to erase everything.
- Select Reset to proceed.
- When prompted, select Erase All Data to confirm (this is the point of no return).
- Your console will restart and begin the reset process. This takes 5-15 minutes.
- Once complete, your Switch will display the initial setup screen, just like out of the box.
Don’t turn off your console during the reset. Let it complete fully, even if it seems stuck. The process is finished when you see the setup screen asking for language preferences.
What Happens After A Factory Reset
After the reset, your Switch is completely clean. You’ll need to:
- Set up your console again with language, time zone, and internet preferences.
- Sign in with your Nintendo Account (if you haven’t already, you’ll be prompted).
- Restore your save data if you backed it up through Nintendo Switch Online. Go to System Settings > Data Management > Save Data Cloud Backup and select Download.
- Re-download your games from your Library. They’ll reappear in your purchased games list.
The reset usually solves persistent blue screen issues caused by system-level corruption. If the problem persists even after a factory reset, you’re almost certainly dealing with a hardware issue that requires repair. Contact Nintendo Support at that point, hardware problems are outside your ability to fix at home.
Hardware Repair And Warranty Options
If your Switch still crashes after trying all the troubleshooting steps above, hardware failure is likely the culprit. Let’s cover your repair options.
Diagnosing Hardware Problems
Hardware failures usually show consistent patterns. If the blue screen happens regardless of which game you play, even after a factory reset, it’s not software. If the console overheats during normal use (hot enough that you can’t comfortably hold it), that’s a hardware issue. Strange behavior like random crashes while navigating menus, or the system refusing to charge properly, also points to hardware.
You can perform a quick hardware diagnostic:
- Go to System Settings > System > Console Information.
- Note your console’s serial number and revision (this matters for repair purposes).
- Try different games in different modes (handheld, docked, tabletop) to see if the issue is mode-specific.
If crashes only happen in docked mode, the dock itself might be faulty rather than the console. If crashes happen only in handheld mode, the screen or internal connections might be the issue. This information helps diagnostics.
Physical inspection matters too. Look for: cracked screen or bezel, water damage indicators (tiny dots inside the device), visible burn marks, or obvious physical damage. These all indicate hardware problems.
Nintendo Repair Services And Costs
Nintendo offers official repair services through their support website. The process is straightforward.
How to request a repair:
- Visit the Nintendo Support website (you can also check resources like Tom’s Guide for console comparison details).
- Navigate to the Switch repair section and describe your issue.
- Nintendo will provide a prepaid shipping label and repair estimate.
- Ship your console to their repair center.
- Nintendo diagnoses the issue and repairs or replaces components as needed.
- Your console ships back within 1-2 weeks of arrival.
Costs depend on the issue and your warranty status:
- In Warranty (1-2 years from purchase): Most repairs are free. You only pay if damage is determined to be user-caused.
- Out of Warranty: Repairs typically cost $95-$150 depending on the component. A complete motherboard replacement runs higher than a screen or dock repair.
- Accidental Damage: Water damage, physical damage, or falls usually aren’t covered under standard warranty. Out-of-warranty fees apply.
Third-party repair shops like iFixit or local electronics repair stores offer faster turnaround (sometimes same-day) and lower costs for some repairs, but they may void remaining warranty. Only use authorized or reputable shops, poor repairs can cause additional damage. For newer consoles still under warranty, always use Nintendo’s official service to preserve coverage.
If your Switch is very old (4+ years) and repairs cost more than half the price of a new console, replacement might be more economical. The Nintendo Switch OLED model or the newer standard Switch revision might be worth considering if you’re in that situation.
Prevention Tips To Avoid Future Blue Screens
Once you’ve fixed your blue screen issue, don’t let it happen again. These prevention habits reduce your risk significantly.
Maintain Your System Regularly
Regular maintenance keeps your Switch healthy. Make it a monthly habit:
- Update your system software as soon as patches are available. Go to System Settings > System > System Update and check monthly.
- Clear cache for games you play frequently. Go to Data Management > Manage Software, select the game, and clear cache if the option appears.
- Check your storage space. Keep at least 2-3 GB free. Go to System Settings > System > Storage. Delete old save files, screenshots, or videos you don’t need.
- Restart your console weekly. A proper shutdown and restart clears temporary files and keeps everything running smoothly.
- Download and install game updates when they’re available. Go to the game’s icon on your Home Screen, press the + or – button, and select “Software Update.”
These simple habits prevent most issues from developing. A well-maintained Switch rarely crashes.
Protect Your Console From Physical Damage
Hardware problems often start with physical damage you didn’t realize happened. Prevention is worth far more than repair.
- Use a protective case when transporting your Switch. A good case absorbs impacts and prevents drops from becoming disasters.
- Avoid extreme temperatures. Don’t leave your Switch in a hot car or expose it to freezing temperatures. Keep it between 50-95°F for safe operation.
- Keep it away from liquids. Water damage is permanent and expensive. Don’t charge it with wet hands, and keep it away from spills.
- Don’t force connections. Insert Joy-Cons, microSD cards, and dock connections gently. Forcing components can break internal connectors.
- Let it cool down. If your console gets hot during long gaming sessions, take a 20-minute break. Extended overheating degrades components.
- Use official or quality third-party accessories. Cheap charging cables and docks can damage your console. Stick with Nintendo-licensed equipment or high-quality alternatives from brands like Anker on Amazon.
Manage Storage And Memory Wisely
Storage problems are overlooked causes of crashes. Managing your storage prevents issues:
- Monitor available space. Aim to keep 5-10% of your storage free (roughly 5-10 GB on a 64GB console). Full or nearly full storage causes crashes and slowdowns.
- Use a quality microSD card. A genuine SanDisk or Samsung card is worth the cost. Cheap or counterfeit cards fail frequently and cause widespread problems.
- Don’t delete and reinstall games constantly. Each installation and deletion ages your storage slightly. If you regularly delete games, your storage will degrade faster.
- Archive instead of delete when possible. Archived games don’t take up space but can be re-downloaded quickly.
- Delete old screenshots and videos. These accumulate over time and eat storage space. Periodically clean out your gallery.
- Back up important save data to Nintendo Switch Online cloud backup. This protects your progress if something goes wrong.
Proper storage management keeps your system running smoothly and prevents crashes related to insufficient space. A well-organized Switch is a stable Switch.
Conclusion
The Nintendo Switch blue screen is frustrating, but it’s almost always fixable. Most users solve the problem with a force restart or cache clear in under ten minutes. For tougher issues, the advanced troubleshooting steps work reliably, system updates, game reinstalls, and microSD card checks resolve the majority of remaining cases.
If you’ve worked through the entire guide and your console still crashes, you’re looking at either a corrupted system that needs a factory reset or a hardware problem requiring official repair. There’s no shame in that: consoles are complex devices, and failure happens eventually with heavy use.
The key is knowing where to start and what to try next. Begin with the quick fixes, move to advanced troubleshooting if needed, and only consider a factory reset or repair service when you’ve exhausted the safe options. Keep your system updated, protect your hardware from physical damage, and manage your storage wisely, and you’ll keep blue screens at bay for years to come.
Your Switch is a solid piece of gaming hardware. Give it proper care, and it’ll return the favor with countless hours of uninterrupted gameplay.