


Table of Contents
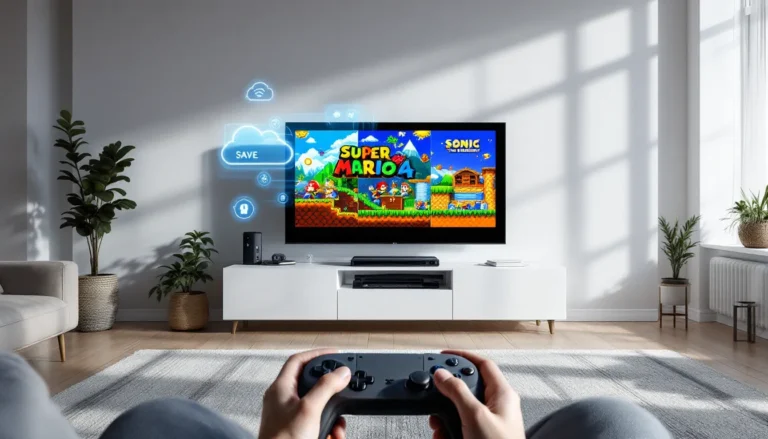
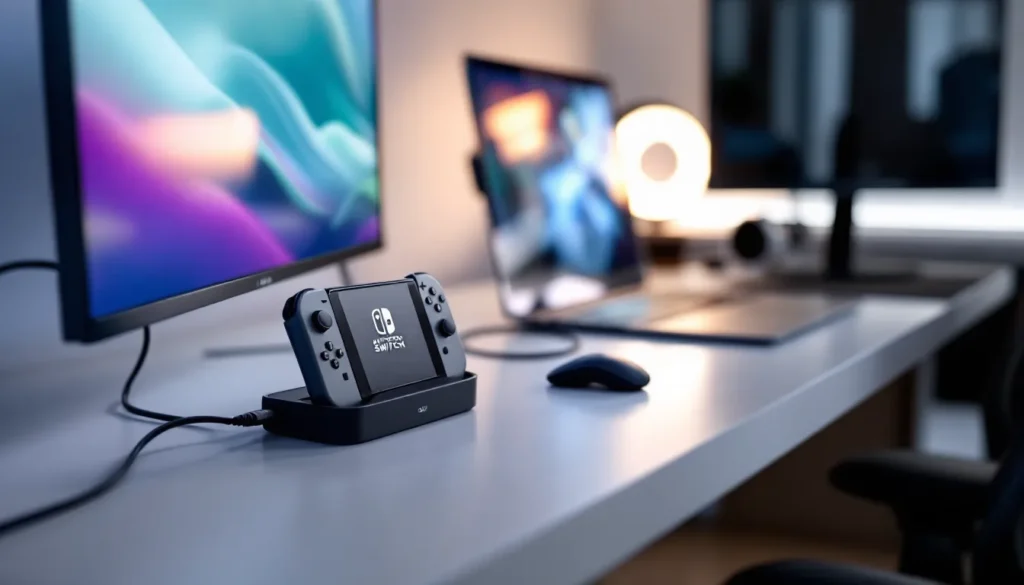
ToggleDocking your Nintendo Switch to play on a bigger screen is convenient, but connecting it to your laptop opens up entirely different possibilities. Whether you want to stream to your gaming audience, record footage for content creation, or simply play on a larger display while keeping your hands on the controller, getting your Switch talking to your laptop is easier than it might seem, once you know what approach fits your setup.
The good news? You’ve got options, and not all of them require dropping cash on expensive hardware. Depending on what you’ve already got lying around (or what you’re willing to invest in), you can get a solid connection working within minutes. This guide covers every method from the simplest HDMI workarounds to pro-level capture card setups, so whether you’re a casual player or a streaming-focused creator, you’ll find what works for your situation.
Key Takeaways
- Connecting your Nintendo Switch to a laptop offers multiple methods—HDMI pass-through, capture cards, and wireless casting—each with different latency, cost, and capability tradeoffs.
- USB capture cards like the Elgato HD60 S+ are the most reliable and versatile solution for streaming, recording, and gaming, with 40–100ms latency that works for most play styles.
- HDMI pass-through requires rare hardware support (HDMI input or USB-C video input on your laptop) but delivers the lowest latency with virtually no delay once configured.
- Wireless casting methods suffer from noticeable latency and inconsistent driver support on both Windows and macOS, making them impractical for fast-paced games but acceptable for turn-based titles.
- Troubleshooting connection issues typically involves checking cables, updating drivers, restarting devices, and verifying power connections—solutions that resolve 95% of common problems.
- Budget-conscious creators can start with $40–60 generic USB capture cards, while professionals should invest in name-brand options with proven software integration and support.
Understanding Your Connection Options
Before you buy anything or plug cables in, it helps to understand what you’re actually trying to do. “Connecting your Switch to your laptop” can mean different things depending on your end goal, and each approach has tradeoffs in terms of cost, complexity, and capability.
HDMI Pass-Through Docking
The most straightforward method is using your laptop as an external monitor. Your Switch outputs video via HDMI, and you route that signal into your laptop’s display. Here’s the catch: most modern laptops don’t have HDMI input ports, they’re designed to output video, not receive it. This rules out the simple plug-and-play approach you might be imagining.
But, if your laptop happens to be an older model (or a rare newer one) with HDMI input, or if it has USB-C with video input support, you’re golden. Connect the Switch dock to the laptop via the appropriate cable, and you’re playing on the bigger screen with zero added latency. It’s the dream setup, but it’s uncommon.
Wireless Display Streaming
Wireless casting offers the appeal of cable-free gaming. Windows 10 and later, plus macOS, both support wireless display protocols that theoretically let you mirror or cast your Switch’s output to your laptop. The reality is more complicated: the Switch itself has limited wireless display support, and what works varies by OS and hardware.
For Windows users, connecting via Miracast is possible in specific scenarios. Mac users have fewer options. The trade-off here is latency, wireless introduces delay that’s noticeable in fast-paced games. For turn-based or strategy titles, you might not care. For competitive games or anything with tight inputs, this method falls short.
USB Capture Cards
Capture cards sit between your Switch and your laptop, intercepting the video and audio signal and converting it into data your laptop can understand and display in real-time. They plug into your Switch dock (via HDMI from the dock) and connect to your laptop via USB. You install software on your laptop, and the capture card’s software lets you see and record the Switch’s output.
This method adds a small amount of latency (usually 40–100ms depending on the card and software), but it’s the most reliable, versatile, and widely supported solution. It works on any laptop with USB ports and handles streaming, recording, and display simultaneously. Most serious creators and streamers use this approach.
What You’ll Need Before You Start
Not every connection method requires the same gear, but knowing what you actually need prevents wasted money and frustration.
Hardware Requirements
For HDMI pass-through: Your laptop must have HDMI input (rare) or USB-C with video input support. Check your laptop’s spec sheet or manual. Most gaming laptops from recent years have USB-C, but not all versions of USB-C support video input, it’s usually mentioned in the manual or on the manufacturer’s website.
For wireless casting: You need a laptop running Windows 10/11 or macOS with built-in Miracast or AirPlay support. A strong Wi-Fi 5 or Wi-Fi 6 network is recommended: weak signal means stuttering and disconnects.
For capture cards: Any laptop with available USB 3.0 or USB-C ports works. USB 2.0 is technically possible but can bottleneck higher resolution signals. You’ll also need an HDMI cable (to connect the dock to the capture card) and the Switch dock itself, of course. If you’re using the Switch’s USB-C dock instead of the standard TV dock, some capture cards require adapters.
A common setup includes a Nintendo Switch dock (standard or USB-C version), an HDMI cable, a USB capture card, and a USB-C to USB-A cable or matching USB cable depending on the card’s connector.
Software And Driver Setup
For wireless connections, you typically don’t need drivers, it’s handled by your OS. Windows and macOS manage Miracast and AirPlay respectively, though you may need to enable these features in system settings.
Capture cards always require software. Most come with proprietary software (like Elgato’s Control Center for their Stream Deck and capture products), or they work with free software like OBS Studio. You’ll download and install this before connecting the card. Drivers might auto-install, or you’ll need to grab them from the manufacturer’s website. Always check if your specific card has driver support for your OS version, some older cards don’t play nice with Windows 11 or the latest macOS.
For optimal performance, update your Nintendo Switch system software before attempting any connection method. Outdated firmware can cause compatibility issues and performance bugs.
Connecting Via HDMI And USB Dock
If you’ve confirmed your laptop has HDMI or USB-C video input, this is your path. It’s the lowest-latency option and requires minimal software setup.
Step-By-Step Dock Configuration
-
Power down the Switch and remove it from the dock if it’s already docked. Unplug the power adapter from the dock.
-
Prepare your laptop: Shut down any apps that might interfere with display detection (this is rare, but Zoom, OBS, or other video apps can cause hiccups). Have your HDMI cable or USB-C adapter ready.
-
Connect the dock to your laptop: Plug the HDMI output from the dock into your laptop’s HDMI input port. If using USB-C, use a USB-C cable or an appropriate adapter. Some USB-C ports require a specific adapter (like a USB-C to HDMI converter) to work properly.
-
Plug in the power adapter: Connect the dock’s AC power back in. The dock needs power to output video, even if it’s not docked to a TV.
-
Dock the Switch: Place the Switch in the dock. You should hear the typical “click” or see the dock’s light indicate it’s connected.
-
Switch detection: Your laptop should automatically detect the new display. On Windows, you might see a “New display detected” notification. Go to Settings > System > Display to configure resolution and scaling if needed. On macOS, check System Preferences > Displays if the Switch isn’t appearing.
-
Extend or mirror: Decide if you want to mirror (same image on both screens) or extend (different content on each screen). For gaming, mirroring is usually what you want. Press Windows key + P on Windows and select “Duplicate” or use the display menu on macOS.
After this setup, the Switch behaves like an external monitor. There’s virtually no latency since it’s a direct HDMI connection.
Troubleshooting Display Recognition
The laptop doesn’t detect the display: First, check that the HDMI cable is fully seated on both ends. Swap cables if you have another HDMI cable available, sometimes cables go bad. On Windows, right-click the desktop and choose Display settings, then click Detect. If the Switch still doesn’t show, try a different USB-C port on your laptop if you’re using a USB-C connection.
Video works but no audio: HDMI should carry both video and audio, but sometimes audio drivers need a nudge. In Windows, go to Settings > Sound and check that the HDMI device is set as the default playback device. On macOS, check System Preferences > Sound > Output.
Resolution is too low or image is stretched: This usually happens if your laptop auto-detected the wrong resolution. Go into display settings and manually select 1920×1080 at 60Hz, this matches the Switch’s typical output. Scaling can also cause blurriness: try setting scaling to 100% in display settings.
If none of this works, check your AC Adapter Nintendo Switch to confirm the dock has sufficient power, a failing power adapter prevents proper video output.
Using Capture Cards For Advanced Streaming
Capture cards are the Swiss Army knife of Switch-to-laptop setups. They’re essential if you plan to stream to Twitch, YouTube, or Discord, and they’re also the most reliable method for Windows users without native HDMI input.
Popular Capture Card Options
Elgato HD60 S+ is the industry standard for streamers. It’s a USB 3.0 device that captures 1080p at 60fps with minimal latency. Elgato’s software integration is seamless, their Control Center app handles all settings, and it plays nicely with OBS, Streamlabs, and most streaming platforms. Price point is around $200, making it an investment, but pros use it for a reason.
AVerMedia Live Gamer Portable 2 Plus is a solid alternative, especially for budget-conscious creators. It handles 1080p at 60fps, has USB 3.0 connectivity, and costs about $150. The software is competent if not as polished as Elgato’s, but it integrates with the major streaming apps.
Blackmagic Design UltraStudio Mini Recorder is overkill for most people, it’s a prosumer-grade device used in video production studios. That said, if you’re serious about video quality and already have some production experience, it’s worth knowing about. It requires a gaming laptop with Thunderbolt 3 and costs over $400, so it’s not a casual purchase.
Budget option: Generic USB 3.0 capture card (often branded generically on Amazon) can run $30–60. These work with OBS Studio and other software, but driver support is inconsistent, and the software bundled with them is often clunky. They’ll capture 1080p at 60fps if your USB connection is solid, but expect occasional dropouts and driver headaches. Good for testing the waters before investing in a name-brand card.
For most gamers, the Elgato HD60 S+ is the sweet spot: reliable, widely supported, and the latency is low enough for playing fast-paced games while streaming.
Setting Up Capture Software
Step 1: Connect the hardware. Plug the HDMI cable from your Switch dock into the capture card’s HDMI input. Connect the capture card to your laptop via USB 3.0 (or Thunderbolt for devices that support it). Plug in the dock’s AC power as usual.
Step 2: Install drivers and software. Download the official software from the capture card manufacturer’s website. For Elgato, this is the Control Center app. Run the installer and let it detect the capture card. Windows or macOS will prompt you to install drivers if needed, allow this to proceed.
Step 3: Launch the software. Open the capture application (Elgato Control Center, AVerMedia’s software, etc.). It should automatically detect the Switch’s signal once the dock is powered on and the Switch is docked. You’ll see a live preview of what the Switch is outputting.
Step 4: Configure audio and video settings. In the software, check that video resolution is set to 1080p at 60fps. Audio input should be set to HDMI or the auto-detected input. If you’re not hearing audio through your laptop speakers, check that the capture software’s audio output isn’t muted and that your system audio is routing correctly.
Step 5: Set up streaming or recording. If streaming to Twitch or YouTube, install and configure OBS Studio (it’s free and open-source). In OBS, add a new source and select your capture card as the input. For recording locally, most capture card software has built-in recording features, hit record and it saves directly to your drive.
Latency will be anywhere from 40–100ms depending on the card and USB connection quality. This is low enough to play live, though experienced players might notice a slight delay compared to playing on the TV directly. For streaming, this latency is actually desirable, it gives you a buffer between what viewers see and what you’re doing, preventing stream sniping in competitive games.
A pro tip: in most capture card software, you can choose whether the preview window shows the raw Switch output or includes overlays and effects. For playing, disable effects to reduce latency further. For content creation, enable them to add branding or information overlays.
Wireless Connection Methods
Cable-free gaming sounds appealing, and in some cases it works well. The limitations are real, though, so understand what you’re trading off.
Casting To Windows And MacOS
Windows 10 and 11 support Miracast, a wireless display standard. The Switch doesn’t natively support Miracast, but you can use workarounds. Some third-party apps claim to enable casting, though compatibility is hit-or-miss. The most reliable approach is using a Miracast receiver app on Windows: your laptop essentially becomes a wireless display adapter. Download an app like Miracast Receiver from the Microsoft Store, enable it, and then attempt to connect from another device (though the Switch’s native wireless display options are limited).
Honestly? This method is more trouble than it’s worth for the Switch. The Switch’s built-in wireless display features are barebones, and most solutions involve workarounds that introduce lag and reliability issues.
macOS doesn’t have native Miracast support. Apple uses AirPlay, which the Switch also doesn’t natively support. You’d need third-party software that acts as an AirPlay receiver, and again, the Switch lacks native AirPlay capability. Doable in theory, unreliable in practice.
Third-Party Wireless Solutions
Some third-party manufacturers have created wireless adapters specifically designed to work with the Switch. These are USB dongles or devices that you plug into your laptop and configure to receive the Switch’s wireless signal.
Wireless capture cards exist but are rare and expensive. Most of them are region-specific or designed for streaming rather than personal use. They also suffer from the same latency and interference issues as any wireless solution.
AnyDesk or remote desktop software is another angle: you control your laptop remotely from the Switch via Wi-Fi, essentially reversing the usual setup. You’d see your laptop’s screen on the Switch, not the other way around. Not what you’re after.
The reality is that for reliable gaming-focused wireless connection, the market hasn’t solved this as elegantly as with wired options. Wireless introduces variables (Wi-Fi interference, router distance, bandwidth contention) that don’t exist with HDMI or USB capture cards. If latency matters to you, and for most games it does, skip wireless. If you’re playing turn-based games or asynchronous titles where a 200ms delay doesn’t kill the experience, then wireless becomes optional.
For streaming purposes, even if you’re using wireless casting to see the game on your laptop screen, you’d still want a capture card for the best quality stream. Wireless casting isn’t reliable enough for professional streaming.
Optimizing Your Connection For Gaming
Once you’ve got the basic connection working, tweaking settings can make a huge difference in how the experience feels. A few minutes spent optimizing beats hours of frustration from lag or poor audio.
Reducing Latency And Input Lag
For HDMI connections: Latency is already minimal, but check your laptop’s display settings for any “smoothing” or “motion blur” options and disable them. Some laptops apply post-processing to the video signal, and turning that off shaves off a few milliseconds. Also, set your display refresh rate to 60Hz to match the Switch’s output, this prevents frame pacing issues.
For capture cards: Use USB 3.0 or faster connections. USB 2.0 can bottleneck 1080p signals. If your laptop has multiple USB ports, try different ones, sometimes one port has better bandwidth than another. In the capture software, look for options like “Low Latency Mode” or “Game Mode.” Elgato and AVerMedia both have these toggles. Enable them. They disable certain processing to get the signal to your screen faster.
If you’re also streaming while playing, the latency trade-off is worth it. If you’re only streaming to yourself (for recording later), lower-latency local monitoring while still streaming at high quality is possible if your laptop can handle it.
Network optimization for wireless: If you absolutely must use wireless, keep your laptop close to your router, minimize interference from other devices, and use the 5GHz Wi-Fi band if possible (it’s faster, though shorter range, than 2.4GHz).
One oft-overlooked culprit in latency is your TV or monitor’s own input lag. If you’re plugging the Switch dock into a monitor connected to your laptop, the monitor’s processing time adds to the total latency. High-refresh gaming monitors (144Hz, 165Hz) often have lower input lag than regular office monitors. If you’re serious about low latency, this matters.
Audio And Video Settings
Video resolution: The Switch outputs 1080p at 60fps by default, and most games run at this standard. Some games target 720p at 60fps or 900p at 30fps. Your laptop can display all of these, but match your capture card or display settings to what the Switch is actually outputting. Scaling a 720p image to 1080p on your laptop looks blurry: set your laptop to display at the Switch’s native output resolution.
Audio formats: The Switch outputs stereo audio via HDMI. Most capture cards and HDMI connections handle this automatically, but if you’re not getting sound, check your audio input settings in Windows or macOS. Some laptops route audio from HDMI inputs to a separate audio device in the system mixer. Set the HDMI input as your default playback device if you want to hear the game through your laptop speakers.
For streaming, if you want to add a microphone or commentary, configure your capture software or OBS to mix the Switch’s audio with your mic input. This requires a bit of software tweaking, but it’s standard streaming practice.
Brightness and color: Gaming content often assumes a darker viewing environment than your average office. If the game looks washed out on your laptop screen, increase the brightness in your laptop display settings or adjust gamma in the game itself (if available). This is personal preference, but it matters for visibility in dark games like Ghost of Tsushima or horror titles.
Frame rate stability: If you notice stuttering or frame drops in games, check your laptop’s performance. Close background apps (Discord, Chrome tabs, system updates). If your laptop is thermal throttling (getting too hot), you’ll see performance drops. Clean your laptop’s vents or use an external cooling pad if gaming for extended sessions. Game streaming is CPU and GPU-intensive: if your laptop is older or mid-range, you might need to close other apps to maintain smooth performance.
Common Issues And Quick Fixes
Things go wrong. Here’s how to fix the most common headaches.
No Signal Or Display Problems
Capture card detected but no video signal:
- Restart the capture software. Close it completely (check Task Manager to ensure it’s not running in the background), then reopen it.
- Restart the Switch. Power it off, wait 10 seconds, and turn it back on. Sometimes the HDMI handshake between the dock and capture card needs to be re-established.
- Check the HDMI cable. Unplug it from both the dock and the capture card, wait a few seconds, and plug it back in. A loose connection kills the signal.
- Try a different HDMI cable if you have one. HDMI cables can go bad, and a faulty cable looks like no signal.
- Make sure the dock has power. If the dock’s power light isn’t on, the HDMI output won’t work. Plug in the AC adapter.
Laptop doesn’t detect the HDMI input:
- Restart your laptop. Sometimes the display driver needs a reboot to recognize a new input.
- Update your display drivers. Go to your GPU manufacturer’s website (NVIDIA, AMD, Intel) and download the latest drivers. Outdated drivers cause detection issues.
- Try a different USB-C or HDMI port on your laptop. Ports can fail: if one port isn’t working, another might.
- If your laptop is docked to an external display, disconnect it. Sometimes having two external displays confuses Windows’ display detection.
- On Windows, right-click the desktop and select Display settings, then click Detect. Force the detection if it’s not automatic.
Picture is visible but distorted or corrupted:
- This usually means the signal is degraded. Check your HDMI cable and connections again.
- If using USB-C, ensure you’re using a cable rated for video (not just charging). USB-C cables vary in capability.
- In the capture software, try lowering the resolution from 1080p to 720p temporarily. If that works, your USB connection might not have enough bandwidth for 1080p.
Connection Drops And Instability
Frequent disconnects:
- Check for USB conflicts. If your laptop has a dock or hub connected, try plugging the capture card directly into the laptop instead of the hub. Some hubs have power delivery issues that disrupt data.
- Update your motherboard/chipset drivers. On Windows, go to Device Manager, find your chipset under System Devices, right-click it, and update. This can fix USB stability issues.
- Close resource-heavy applications. Chrome with 20 tabs open, Zoom, Discord, OBS, and streaming software simultaneously tax your USB bandwidth. Close unnecessary apps.
- Test with a different USB port. Your laptop likely has multiple USB 3.0 ports: different ports connect to different USB controllers on your motherboard. One might be more stable than another.
Audio cuts out or crackles:
- This is usually a CPU or USB bandwidth bottleneck. Close background apps and reduce the bitrate if streaming. You might need to reduce your streaming resolution from 1080p to 720p.
- Update your audio drivers. In Windows, right-click the speaker icon in the system tray, select Sounds, and look for an option to update drivers.
- In your capture software, disable any audio effects or processing temporarily. Sometimes post-processing causes glitches if the CPU is maxed out.
Game runs fine on TV but lags on laptop:
- Confirm you’re actually experiencing input lag and not just noticing the difference between the Switch’s TV mode and laptop mode (which are different form factors). Use a stopwatch or online tool to measure actual latency if you’re unsure.
- Close other applications. Gaming while streaming, recording, and running Discord or OBS strains your CPU. If you’re capturing 1080p at 60fps AND streaming at high bitrate, that’s a lot of data. Your laptop might not be beefy enough for all of it simultaneously.
- Disable V-Sync in your streaming software if available. V-Sync adds latency. For a local preview, you want the lowest latency possible, which means no processing.
- Check your laptop’s thermal performance. If it’s hitting 90°C+ while gaming, thermal throttling is kicking in and your performance drops. Use an external fan or cooling pad.
If you’ve gone through all these steps and still have issues, check whether the problem occurs with a specific game or across all games. If it’s specific to one title, the game itself might have performance issues on your setup (sometimes a particular game just doesn’t optimize well with a specific GPU or CPU combo). Try a different game to isolate whether it’s hardware or software.
For persistent issues related to software stability, make sure your Unable to Start Software Nintendo Switch is updated and that the game you’re playing is up-to-date with the latest patches.
Conclusion
Connecting your Nintendo Switch to a laptop gives you flexibility the standard TV dock can’t match. Whether you choose the simplicity of HDMI pass-through, the reliability of a capture card, or the wireless convenience of casting depends on your hardware, use case, and tolerance for latency.
For pure gaming with minimal latency: go HDMI if your laptop supports it. For streaming, recording, or content creation: a capture card is the professional standard for good reason. For turn-based games or casual play where latency doesn’t matter: wireless casting works in a pinch.
The setup itself takes 20 minutes once you’ve got the hardware. The optimization, testing different USB ports, tweaking audio levels, disabling unnecessary background processes, takes a bit longer but pays dividends in stability and performance. Most issues you’ll encounter have straightforward fixes: the troubleshooting guide above covers 95% of common problems.
Starting with a capture card like the Elgato HD60 S+ is a smart middle-ground choice: it’s more expensive than HDMI-only solutions, but it’s versatile enough to handle gaming, streaming, and recording, and the driver support and software are rock solid. If you’re just testing the waters, a budget USB capture card costs $40–60 and answers the question of whether you even want this setup before you invest in the premium stuff.
Once you’ve got it running, enjoy the bigger screen and the freedom to record or stream your gameplay. The Switch is fantastic on a TV, but on a laptop with a capture card, you’ve got a content creation machine.